Musculoskeletal disorders (MSDs), or ergonomic injuries, are the leading cause of workplace absenteeism and disability. According to Beth Mayotte, Ergonomist, Occupational Therapist and Owner of ergonomic consultancy, ErgoWorks, an immediate step you can take to better understand the MSD risks in your facility is to conduct an ergonomic screen.
Below, Beth shares how you can perform an ergonomic screen in 3 easy steps – along with “quick fixes” you can put into action today.
Beth co-led our recent webinar, the 3-Step Ergonomic Screen. You can watch the full webinar and Q&A on our YouTube channel, here. Below is a written recap with video highlights.
Step 1: Gather Relevant Data
"Before you even go down to the production floor, you want to have a couple conversations and gather some data,” says Beth. “Understanding injury history, the pains employees are experiencing, and which body parts are most impacted will help you focus your assessment.”
According to Beth, there are 2 critical pieces of data you need to gather:
I. Understand Injury History
Look at recordable injury rates, the history of a given engine line or even a single workstation. Answer questions like:
- What's the injury history with the area you're evaluating?
- What pains or symptoms are you hearing most about?
- What body parts are most affected (e.g., lower back)?
For example, are employees experiencing foot and lower back pain? This may tell you their anti-fatigue mats have gone flat or are too small. Are they experiencing shoulder or neck pains? They may be constantly over-reaching due to tables that are too high.

Before the actual assessment, it's important to have context through data, says Beth. E.g., injury history, hiring issues (or wins), and insight from employees.
Look at the hiring history of the facility or area you are evaluating. Has your company had trouble getting people in the door or, more importantly, keeping them once hired?
"Sometimes HR has a hard time staffing a certain area,” says Beth. “Perhaps there's an ergonomic reason someone leaves within a week of being hired."
Step 2: Talk to Your People
“Your best ergonomists are often the employees standing in their workstations for hours each day,” says Beth. “Talk to your most seasoned employees and brand-new employees. Get a full range of perspectives.”
According to Beth, ask the following questions:
- What's the worst part of your job?
- What's the most challenging part of your job?
- What are some things that you would change if you could?
- Do you have ideas for how we could make this job easier for you?
Ergonomist and Owner of OptimaEHS, Mary Plehal, breaks down the 5 keys to conducting a good comfort survey – a survey that will give you the information you need to make more informed decisions:
Written summary of how to create an effective comfort survey.
Step 3: Observe 5 Work Processes
With historical data in hand, and with important feedback and context from team members, you now have the tools you need to go down to the plant level and assess each workstation. The following section looks at 5 specific actions to evaluate.
However, the ultimate goal, according to Beth, is to answer one key question:
Is this action a choice an employee is making, or is it they what the job requires them to do?
For example, is an employee choosing to carry something heavy when a cart is available, or are they carrying the object because they have no other option? Are they standing half on/half off their anti-fatigue mat because it's too small, causing lower back pain, or is the mat simply placed incorrectly?
The ultimate goal is to understand why choices are being made and the effect of those choices (e.g., pain, fatigue, injury, morale, production). With this information, you can determine whether your next steps include education or changes to the workstation.
Recommended tools for an ergonomic screen:
- Bring a tape measure
- Bring a stopwatch
- Bring a notebook
- Take pictures
- Take video
The 5 actions you should observe:
A. Reaching
“Make note of anything over a 24-inch reach, or beyond the length of that employee's fingertips when their arm is fully extended in front of them,” says Beth. “Reach can also sometimes look like leaning forward and being on their tiptoes.”
What to document: Are employees leaning forward regularly or standing on their tiptoes to reach items? Are they reaching beyond their fingertips when standing flat footed? Is the workstation accommodating to a wide variety of employee heights?

Can employees do their work without standing on their tiptoes or reaching beyond their fingertips? This is key to preventing ergonomic injury, says Beth.
B. Sitting vs. Standing
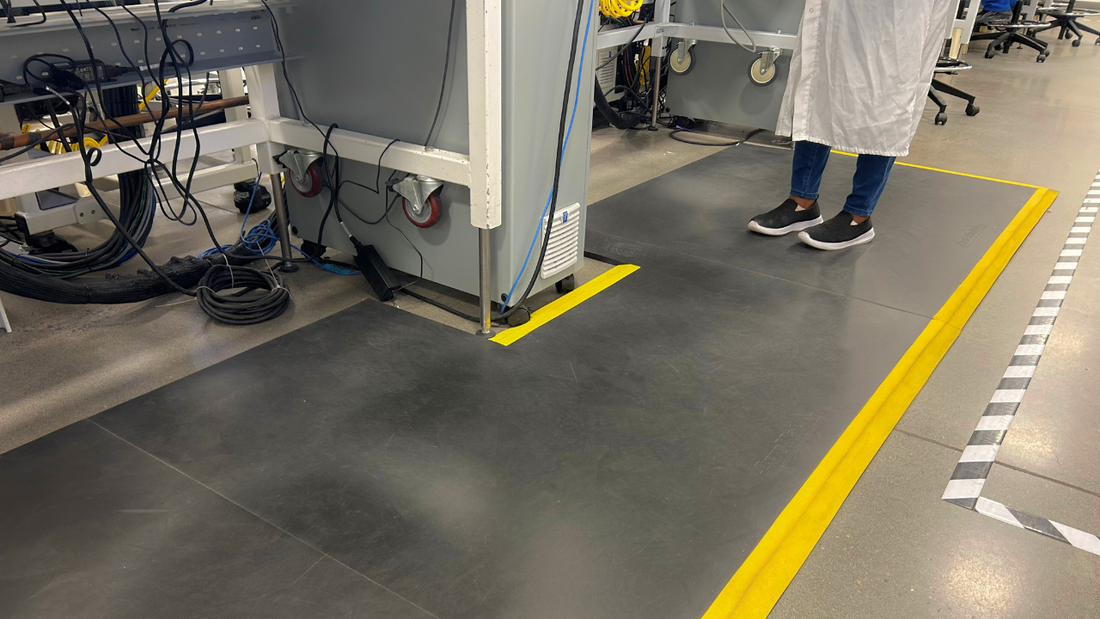
Ideally, employees have the ability to sit and stand throughout their shift, says Beth. Whenever possible, chairs and tables should be height adjustable. Next, look closely at the anti-fatigue mats in place for workers who stand long hours – size and shape is critical to prevent edge standing, half on/half off standing, constant on/off stepping, and gaps in coverage.
What to document: Are the anti-fatigue mats going flat? Are they the precise size and shape employees need to avoid edge standing, constant on-off stepping, or gaps in coverage? Can the worktables be height-adjusted to suit shorter/taller workers? Do your chairs have adjustable arm and foot rests?

Mats that are the wrong shape and size can lead to "postural instability." Says Beth, "It's important to get the right size, shape and material."
C. Lifting Risks
The key here is to make sure employees are in their “power zones” as much as possible, says Beth. Power zones are defined as between their waist and their shoulders. For example, if employees are frequently lifting items above their shoulders or bending below their waste, the risk of MSD injury is higher and further assessment is required.
What to document: Do employees have equipment to help with lifting heavy objects? Are they choosing to lift something on their own when pallet jacks are available? Are they squatting and lifting with their legs, or are they bending over and lifting with their backs (MSD risk)?

Workstations should allow employees to stay in their "power zones," shares Beth, defined as between their wastes and shoulders.
D. Push, Pull, Carry
What is being moved? Why is it being moved? How is it being moved? These 3 things should guide decisions around what your work processes look like and what risks you need to pay attention to.
As with No. 3 above, consider the “power zone” when watching employes push, pull, and carry.
What to document: Make note of the equipment available. Going back to the ultimate goal above, look closely at – are employees making choices because they want to (e.g., prefer a cart over carrying and may need to be educated) or because they have to (e.g., lacking equipment and forced to carry heavy equipment or products).
E. Multipliers
According to Beth, there are 3 actions/multipliers that will increase the risk of MSD injuries: Force, repetition, and position.
Force, anything over 50 pounds will generally increase injury risks.
Repetition, the more often employees have to repeat an action without a break or reprieve will increase MSD risks.
Position, anything outside of a neutral position, posture, or grip will increase MSD injury risks.
As you conduct your assessment of the actions above, pay close attention to the force of these actions, the amount of repetition you’re seeing, and the position they are standing or sitting in while doing their work.
What ergonomic solutions provide the most impact?
During the ergonomic screening webinar, a safety leader asked Beth what ergonomic solutions provide the “most bang for your buck.” Beth breaks it down in this 3-minute video.
How can you get buy-in for major ergonomic changes?
Also during the webinar, a production supervisor asked Beth and AcroMat General Manager, Russell Herbert, how to get buy-in for major ergonomic changes. Beth and Russell discuss in this 3-minute video, including the actual cost of a single sprain or strain injury.
Summary: Small Steps, Long-term Impact
According to NIOSH, MSDs and work environment are directly connected. I.e., either your work environment is helping reduce MSD injury risks or it’s increasing risks.
An ergonomic screen is one step you can take today to better understand the risks in your facility, and from their make foundational changes to increase the health, safety, and productivity of your employees for the long term.
--
Related: 5 Ways to Test the Ergonomic Support of Your Anti-Fatigue Mats
Related: How TruStile Doors Overcame Injury with Custom Anti-Fatigue Mats